Twitter

Showing posts with label OCI. Show all posts

How to use OCI Gen AI from the Linux command line

OCI Generative AI offers an on-demand service which you can access from your tenancy and pay only for what you use. This is very handy and also ensure that no data goes outside of the company if you were to copy/paste logs into whatever web based LLM. Integrating that capabilty into your daily hands-on work (analyze system state, diagnose issues, generate code, etc...) without ever leaving the terminal is a real productivity booster.
This is why I have developped a function which wraps the OCI CLI Generative AI Inference service that you can source and then call from the command line. You can download the full script from my GitHub repository.
Note that this is not meant to interact with your system, it cannot access your system.


Prerequisites: OCI Setup

Before using the function, you must have the OCI CLI installed and your OCI API keys configured on your system. If you haven't configured API keys yet, check out my step-by-step guide: OCI: Setting up API Keys.


Prerequisites: Compartment ID

You will need to set up your compartment ID inside the function:

DEF_COMP_ID="xxxxxxxxxx"
or export it from the command line before calling the function:
export ENV_COMP_ID="xxxxxxxxxx"
You may also adapt to your region:
export DEF_REGION="yyyyyyy"
or also export it from the command line before calling the function:
export ENV_REGION="us-phoenix-1"


Source the function and a first use

At the time I am writting this blog (Sep-2026), the function is set to use Grok 4.3 -- which can easily be updated into the function as well.
[frdenis@myvm ~]$ source .ai_functions"
[frdenis@myvm ~]$ source .ai_functions"
[frdenis@myvm ~]$ ask_llm "who are you ?"
I'm Grok, an AI built by xAI. I'm here to answer questions, help with problems, and have a bit of fun while doing it. What's up?
[frdenis@myvm ~]$


Storage Pressure Analysis (df)

First example is to check for space pressure on our system by seding the output of df -hto the LLM:
[frdenis@myvm ~]$ ask_llm "has this $(cat /etc/redhat-release) system some space pressure issue ? $(df -h)"
Based on the output, **no critical space pressure** at the moment, but there are a couple of areas worth monitoring:
### Summary
| Filesystem | Usage | Status |
|------------|-------|--------|
| `/` (root) | 61% | Moderate – fine for now |
| `/boot` | 68% | **Highest %** – monitor for kernel updates |
| `/data` | 39% | Healthy |
| `/run` (tmpfs) | 9% (4.1G used) | Using **4.1 GB of RAM** – worth checking |
### Recommendations
1. **`/boot` at 68%**
   This is the most "full" filesystem percentage-wise. If you install new kernels or if old ones aren't cleaned up, you could run into issues during updates. Consider removing old kernels if they're no longer needed.
2. **`/run` tmpfs using 4.1 GB**
   This is in-memory usage. If your system has memory constraints, investigate what's consuming that space:
   ```bash
   du -sh /run/* 2>/dev/null | sort -h
   ```
   Common culprits: large files in `/run/user/*`, container runtime data, or logs written to tmpfs.
3. **Root (`/`) at 61%**
   Not urgent, but if this system generates a lot of logs or temporary data, keep an eye on it.
**Bottom line:** No immediate crisis, but clean up `/boot` and check what's using 4.1 GB in `/run`.


SAR

We can also send the last 7 days of SAR for a quick summary / find potential issues:
[frdenis@myvm ~]$ ask_llm "check if this system has cpu issue, also let me know when are the cpu peaks: $(for i in {1..7}; do sar -u -f /var/log/sa/sa$(date -d "$i days ago" +%d); done)"
**Analysis Summary**
### Overall Assessment
**No significant CPU issue** on this system.
- The system has **16 CPUs** and is very lightly loaded on average.
- Average CPU utilization across all days is only **~10-11%** busy (`100% - 89% idle`).
- `%iowait` and `%steal` are negligible, which is good.
### CPU Usage Pattern
| Metric          | Average | Typical Range | Notes |
|-----------------|---------|---------------|-------|
| **%user**       | ~3.9%   | 0.3 – 24%     | Main driver of spikes |
| **%system**     | ~6.8%   | 6.0 – 8.7%    | Stable |
| **%idle**       | ~89%    | 68 – 93%      | Very healthy |
| **Total busy**  | ~11%    | -             | Low load |
### When CPU Peaks Occur
The system shows **very consistent daily patterns**:
| Time              | Typical Peak | %user | Total Busy | Frequency | Notes |
|-------------------|--------------|-------|------------|---------|-------|
| **12:00 PM – 12:10 PM** | **Highest** | 18–24% | **~25–31%** | Every day | **Main peak** |
| **07:10 AM – 07:20 AM** | High        | 10–17% | ~18–25%    | Every day | Morning spike |
| **11:10 AM, 11:50 AM**  | Medium      | 8–13%  | ~15–20%    | Frequent | - |
| **02:40 PM – 03:10 PM** | Medium      | 7–11%  | ~15–20%    | Frequent | - |
| **02:40 AM – 03:10 AM** | Medium      | 7–13%  | ~15–22%    | Occasional | Night spike |
### Key Observations
- **Biggest and most consistent peak**: **12:00 PM – 12:10 PM** every day (reaches ~30% CPU).
. . .


A quick shell command

We can also generate some code:
[frdenis@myvm ~]$ ask_llm "bash how to find the top 5 biggest files in my directories ?"
Here's the most common and effective way to find the **top 5 largest files** in a directory (including subdirectories):
### From current directory:
```bash
find . -type f -exec du -h {} + 2>/dev/null | sort -rh | head -5
```
### From root (entire system) — requires `sudo`:
```bash
sudo find / -type f -exec du -h {} + 2>/dev/null | sort -rh | head -5
```
### Alternative (faster, shows size in bytes):
```bash
find . -type f -printf '%s %p\n' | sort -rn | head -5
```
### Explanation:
| Command part | Purpose |
|--------------|--------|
| `find . -type f` | Find only files (ignore directories) |
| `-exec du -h {} +` | Get human-readable sizes |
| `sort -rh` | Sort by size, reverse (largest first), human-readable |
| `head -5` | Show only top 5 |
### Tip:
If you want to **exclude certain directories** (like `/proc`, `/sys`, etc.), you can do:
```bash
sudo find / -path /proc -prune -o -path /sys -prune -o -type f -exec du -h {} + 2>/dev/null | sort -rh | head -5
```
It is also very useful for crash diagnosis using /var/log/messages, etc... possibilities are endless. Test it and enjoy!

OCI: Datapump between 23ai ADB and 19c ADB using database link

Now that we know how to manually create a 23ai ADB in OCI, that we also know how to create a database link between a 23ai ADB and a 19C ADB, let's now try a datapump between a 19c ADB and a 23ai ADB (oh, this is also a migration method, right?) using a database link.
First, let's remind our environment:
[fred@myvm ~]$ cd wallet_23ai
[fred@myvm wallet_23ai]$ export TNS_ADMIN=$(pwd)
[fred@myvm wallet_23ai]$ sqlplus admin/"Iw0ntt3lly0u"@sandbox01_high
SQL> select banner_full from v$version;
BANNER_FULL
--------------------------------------------------------------------------------
Oracle Database 23ai Enterprise Edition Release 23.0.0.0.0 - Production
Version 23.6.0.24.10
SQL> select banner_full from v$version@TO_19C;
BANNER_FULL
--------------------------------------------------------------------------------
Oracle Database 19c Enterprise Edition Release 19.0.0.0.0 - Production
Version 19.25.0.1.0
SQL>
Let's datapump that ~ 50 million rows table from our 19C ADB:
SQL> select count(*) from USER_19C.TABLE_19C@TO_19C;
COUNT(*)
----------
 48930604
SQL>
Let's create a simple datapump parfile (nothing specific compared to a "classic" Oracle database):
[fred@myvm ~]$ cat imp.par
TABLES=USER_19C.TABLE_19C
TABLE_EXISTS_ACTION=append
REMAP_SCHEMA=USER_19C:USER_23C
network_link=TO_19C
encryption_pwd_prompt=no
directory=DATA_PUMP_DIR
logfile=imp.log
[fred@myvm ~]$
And run it:
[fred@myvm ~]$ impdp admin/"Iw0ntt3lly0u"@sandbox01_high parfile=imp.par
Import: Release 21.0.0.0.0 - Production on Thu Nov 21 15:47:06 2024
Version 21.14.0.0.0
Copyright (c) 1982, 2024, Oracle and/or its affiliates.  All rights reserved.
Connected to: Oracle Database 23ai Enterprise Edition Release 23.0.0.0.0 - Production
Starting "ADMIN"."SYS_IMPORT_TABLE_01":  admin/********@sandbox01_high parfile=imp.par
Processing object type TABLE_EXPORT/TABLE/TABLE
. . imported "USER_23C"."TABLE_19C"               48930604 rows
Processing object type TABLE_EXPORT/TABLE/GRANT/OWNER_GRANT/OBJECT_GRANT
Processing object type TABLE_EXPORT/TABLE/STATISTICS/TABLE_STATISTICS
Job "ADMIN"."SYS_IMPORT_TABLE_01" completed successfully at Thu Nov 21 16:09:50 2024 elapsed 0 00:22:41
[fred@myvm ~]$
That was very easy and pretty fast: 22 minutes for 48 million lines (with no parallel, this example table was not partitioned).

OCI: ADB 23ai to ADB 19c Database link

This one is very similiar to OCI: Database Link between 2 Autonomous Databases 19c but this time it is the creation of a database link from a 23ai ADB to a 19c ADB. The only difference on top of the version is that I will be creating a private DB Link and not a public DB Link. This is more to ensure that everything is working as expected. I'll put very less comment here aseach step has already been detailed in OCI: Database Link between 2 Autonomous Databases 19c.
Get the 19c DB wallet:
[fred@myvm ~]$ mkdir adb19c_wallet
[fred@myvm ~]$ oci db autonomous-database generate-wallet --autonomous-database-id ocid1.autonomousdatabase.oc1.iad.l4pq7nwusgtxorjiszblek2aqqe2b4jusqtcw5fuev6bwcntifaaq5lna3bl --file adb19c_wallet/adb19c_wallet.zip --password "abc123456"
Downloading file  [####################################]  100%
[fred@myvm ~]$ cd adb19c_wallet
[fred@myvm adb19c_wallet]$ ls -ltr
-rw-rw-r--. 1 frdenis frdenis 21964 Nov 20 12:21 adb19c_wallet.zip
[fred@myvm adb19c_wallet]$ unzip adb19c_wallet.zip
Archive:  adb19c_wallet.zip
  inflating: ewallet.pem
  inflating: README
  inflating: cwallet.sso
  inflating: tnsnames.ora
  inflating: truststore.jks
  inflating: ojdbc.properties
  inflating: sqlnet.ora
  inflating: ewallet.p12
  inflating: keystore.jks
[fred@myvm adb19c_wallet]$
Create a directory into the 23ai database:
[fred@myvm adb19c_wallet]$ cd ../wallet_23ai/
[fred@myvm wallet_23ai]$ export TNS_ADMIN=$(pwd)
[fred@myvm wallet_23ai]$ sqlplus admin/"Iw0ntt3lly0u"@sandbox01_high
SQL>*Plus: Release 21.0.0.0.0 - Production on Wed Nov 20 12:22:22 2024
Version 21.14.0.0.0
Copyright (c) 1982, 2022, Oracle.  All rights reserved.
Last Successful login time: Tue Nov 19 2024 15:35:47 +00:00
Connected to:
Oracle Database 23ai Enterprise Edition Release 23.0.0.0.0 - Production
Version 23.6.0.24.10
SQL> create directory wallet19c as 'wallet19c';
Directory created.
SQL> select DIRECTORY_NAME, DIRECTORY_PATH from dba_directories where DIRECTORY_NAME = 'WALLET19C';
DIRECTORY_NAME        DIRECTORY_PATH
----------------   -----------------------------------------------------------------
WALLET19C            /u03/dbfs/27409389D44E5891E063D911000A6123/data/wallet19c
SQL> select * from dbms_cloud.list_files('WALLET19C');
no rows selected
SQL>
Move the cwallet.sso file into a directory into the 23ai database (long journey to copy a file):
[fred@myvm ~]$ oci os bucket create --name wallet --compartment-id $COMP_DEV
[fred@myvm ~]$ oci os object put --bucket-name wallet --file adb19c_wallet/cwallet.sso
[fred@myvm ~]$ oci iam auth-token create --user-id ocid1.user.oc1..4p2paj5vy5ghhx7ayavkqoiqarqaqomx3jroqabkl32aze7qpamp7wfkfayo --description fred_cred_for_wallet_dblink
. . .
    "token": "9m>1x0heLR4bDe:{8lnT",
. . .
[fred@myvm ~]$ sqlplus admin/"Iw0ntt3lly0u"@sandbox01_high
Connected to:
Oracle Database 23ai Enterprise Edition Release 23.0.0.0.0 - Production
Version 23.6.0.24.10
SQL> show user
USER is "ADMIN"
SQL> begin
  2  DBMS_CLOUD.CREATE_CREDENTIAL(credential_name => 'fred_cred_for_wallet_dblink', username => 'fred', password => '9m>1x0heLR4bDe:{8lnT') ;
  3  end;
  4  /
PL/SQL procedure successfully completed.
SQL>
[fred@myvm ~]$ NAMESPACE=$(oci os ns get | jq -r '.data')
[fred@myvm ~]$ REGION="us-ashburn-1"
[fred@myvm ~]$ BUCKET_NAME="wallet"
[fred@myvm ~]$ FILE="cwallet.sso"
[fred@myvm ~]$ echo "https://${NAMESPACE}.objectstorage.${REGION}.oci.customer-oci.com/n/${NAMESPACE}/b/${BUCKET_NAME}/o/${FILE}"
https://qdci7zudoklt.objectstorage.us-ashburn-1.oci.customer-oci.com/n/qdci7zudoklt/b/wallet/o/cwallet.sso
[fred@myvm ~]$ 
SQL> begin
  2  DBMS_CLOUD.GET_OBJECT(
  3  object_uri => 'https://qdci7zudoklt.objectstorage.us-ashburn-1.oci.customer-oci.com/n/qdci7zudoklt/b/wallet/o/cwallet.sso',
  4  directory_name => 'WALLET19C',
  5  credential_name => 'fred_cred_for_wallet_dblink');
  6  end;
  7  /
PL/SQL procedure successfully completed.
SQL> SELECT OBJECT_NAME, BYTES, CREATED from DBMS_CLOUD.LIST_FILES('WALLET19C');
OBJECT_NAME           BYTES CREATED
---------------- ---------- -----------------------------------
cwallet.sso            5349 20-NOV-24 02.35.52.642528 PM +00:00
SQL>
Create some credentials on the 23ai DB (a user and password from the target 19c database are needed):
SQL> show user
USER is "ADMIN"
SQL> begin
  2  DBMS_CLOUD.CREATE_CREDENTIAL(credential_name => 'TO_19C', username => 'ADMIN', password => 'xxxx');
  3  end;
  4  /
PL/SQL procedure successfully completed.
SQL>
And create the database link:
SQL> BEGIN
 DBMS_CLOUD_ADMIN.CREATE_DATABASE_LINK(
 db_link_name => 'TO_19C',
 hostname => '19cDB_host.adb.us-ashburn-1.oraclecloud.com',
 port => '1522',
 service_name => '1a0e3d6a347c8g0_19cDB_high.adb.oraclecloud.com',
 credential_name => 'TO_19C',
 directory_name => 'WALLET19C',
 private_target => TRUE,
 public_link => FALSE);
 END;
 /
 PL/SQL> procedure successfully completed.
SQL>
And finally time to test!
SQL> select banner_full from v$version;
BANNER_FULL
--------------------------------------------------------------------------------
Oracle Database 23ai Enterprise Edition Release 23.0.0.0.0 - Production
Version 23.6.0.24.10
SQL> select banner_full from v$version@TO_19C;
BANNER_FULL
--------------------------------------------------------------------------------
Oracle Database 19c Enterprise Edition Release 19.0.0.0.0 - Production
Version 19.25.0.1.0
SQL>
And you can drop a database link as below:
SQL> begin
  2  DBMS_CLOUD_ADMIN.DROP_DATABASE_LINK(db_link_name => 'MY_PUBLIC_DBLINK', public_link => FALSE);     # Private DB Link
  3  end;
  4  /
PL/SQL procedure successfully completed.
SQL> begin
  2  DBMS_CLOUD_ADMIN.DROP_DATABASE_LINK(db_link_name => 'MY_PRIVATE_DB_LINK', public_link => TRUE);     # Public DB Link
  3  end;
  4  /
PL/SQL procedure successfully completed.
SQL>

OCI: Database Link between 2 Autonomous Databases 19c

Database links are seen by some as evil and as wonderful tools by others. Whatever your side on this, let's see how we can create database links between 2 autonomous databases. The characteristics of the below example are:
  • We want to get data from the PROD1 database
  • The database link will be created into the PROD2 database
  • A network connectivity is already setup between the databases; the ones in this example are in the same tenancy and in the same region; if your databases are in different tenancies, you want to check this documentation first; if they are in different regions, you please have a look at this documentation first
  • The databases can be in the same compartment or not; below example is with 2 databases in different compartments
  • The autonomous databases can be ADW or ATP, it does not matter
  • I will use one and unique Linux VM with a non privileged user fred@myvm on that VM
  • Many operations are only doable by the ADMIN user so be sure you know the ADMIN user credentials
  • Below assumes that your OCI client is configured and works

A summary of what needs to be done looks straigthforward on a graph:
But the fact that these are autonomous databases implies many steps which I will be describing in this blog.
Let's follow and detail each of the steps shown on the above picture.

0/ Requirements summary

A short summary of the requirements to be able to create a DB Link:
  • Network connectivity between the 2 databases
  • A database username and password on PROD1
  • The PROD1 database certificate
  • OCIDs of PROD1, PROD2, your compartments, etc...

1/ Get the PROD1 wallet

Ge the PROD1 database OCID from the console and use it to get the database wallet from your Linux VM:
[fred@myvm ~] oci db autonomous-database generate-wallet --autonomous-database-id ocid1.autonomousdatabase.oc1.iad.xxx --file adb_wallet.zip --password "abc123456"
Downloading file  [####################################]  100%
[fred@myvm ~] ls -ltr adb_wallet.zip
-rw-rw-r--. 1 fred fred 21974 Sep 30 13:05 adb_wallet.zip
[fred@myvm ~]
Note that we must specify a wallet password using this oci db autonomous-database generate-wallet command; related error message you would face (I tried :)) are:
Error: Missing option(s) --password.
"message": "The wallet download password cannot be an empty string.",
"message": "The wallet download password must be at least 8 characters.",
You can also download this wallet from the console: "Autonomous database details" => "Database connection" => "Download wallet"; we won't use this password so feel free to forget that password immediately! Let's unzip the wallet and points the files we will be interested in:
[fred@myvm ~] unzip adb_wallet.zip
Archive:  adb_wallet.zip
  inflating: ewallet.pem
  inflating: README
  inflating: cwallet.sso     <== the certificate we will work with
  inflating: tnsnames.ora    <== we will need host, service and port information at the end of the procedure
  inflating: truststore.jks
  inflating: ojdbc.properties
  inflating: sqlnet.ora
  inflating: ewallet.p12
  inflating: keystore.jks
[fred@myvm ~]
All right, step 1 was easy, let's jump into step 2.

2/ Transfer the certificate

This one looks simple but many steps are needed to achieve the transfer of the certificate; indeed, we have to transfer the PROD1 cwallet.sso file into a PROD2 directory (DBFS). The steps to achieve that are:
  • 2.1/ Create a bucket (unless you already have one)
  • 2.2/ Copy the cwallet.sso file from your Linux VM into your bucket
  • 2.3/ Create a directory into the PROD2 database
  • 2.4/ Copy the cwallet.sso file from your bucket into the PROD2 PROD2 directory
  • 2.5/ Drop your bucket if you created one just for this transfer
And on top of that, we will need to create some credentials to get authenticated here and there. Yeaaaahh all of that just to copy a file . . . hopefully it is a one time thing :)

2.1/ Create a bucket (unless you already have one)

You'll find your PROD2 database compartment OCID in the console (search for "Compartment"):
[fred@myvm ~] oci os bucket create --name wallets --compartment-id ocid1.compartment.oc1..aaaaaaabbbbbbbbcccccccccccfffffffff  
{
    . . .
        "CreatedBy": "default/fred",
        "CreatedOn": "2024-09-30T13:07:25.850Z"
    . . .
    "name": "wallets",
    . . .
}
[fred@myvm ~]


2.2/ Copy the cwallet.sso file from your Linux VM into your bucket

[fred@myvm ~] oci os object put --bucket-name wallets --file cwallet.sso  
Uploading object  [####################################]  100%
{
  "etag": "9fba7327-d979-4b21-a898-8b795ea02f76",
  "last-modified": "Mon, 30 Sep 2024 13:09:42 GMT",
  "opc-content-md5": "sstACFWtW/4qBGNkdH/iuQ=="
}
 [fred@myvm ~]
Check that the file has been correctly copied into the wallet:
[fred@myvm ~] oci os object list --bucket-name wallets
{
  "data": [
      . . .
      "name": "cwallet.sso",
      . . .
}
[fred@myvm ~]


2.3/ Create a directory into the PROD2 database

Note that as of now only ADMIN can create directories and DB Links.
SQL> show user
USER is "ADMIN"
SQL> create directory wallets as 'wallets';
Directory created.
SQL> select OWNER, DIRECTORY_NAME, DIRECTORY_PATH from dba_directories where directory_name = 'WALLETS';
OWNER    DIRECTORY_NAME   DIRECTORY_PATH
-------- ---------------- --------------------------------------------------------------------------------
SYS      WALLETS          /u03/dbfs/0B3BHK09F13420009KP8/data/wallets
SQL>


2.4/ Copy the cwallet.sso file from your bucket into the PROD2 database directory

We now need to create somne credentials to achieve this. I use to go with "Auth tokens" which are kind of the same tokens you use for github if you are familiar with. You'll need your user-id which you can find in the console "Your profile" (top right) => "My profile" then copy your OCID in "User information" or in the ~/.oci/config file (grep user ~/.oci/config):
[fred@myvm ~] oci iam auth-token create --user-id ocid1.user.oc1..xxxx --description fred_cred_for_wallet_dblink
  {
  "data": {
    "description": "fred_cred_for_wallet_dblink",  <== it is actually the credential name
    . . .
    "token": "c]CBZfi97_E(;U5",                    <== your token
    "user-id": "ocid1.user.oc1..xxxx"
  },
  "etag": "89c91cb65f03452fabd74c618609d0bb"
}
[fred@myvm ~]
You can also use the console to get a token: "Your profile" (top right) => "My profile" => "Auth tokens" (bottom left) => "Generate token".

Now create the credentials (as ADMIN):
SQL> show user
USER is "ADMIN"
SQL> BEGIN
  2  DBMS_CLOUD.CREATE_CREDENTIAL(credential_name => 'fred_cred_for_wallet_dblink', username => 'fred', password => 'c]CBZfi97_E(;U5');
  3  END;
  4  /
PL/SQL procedure successfully completed.
SQL>
Note that I kept "c]CBZfi97_E(;U5')" as token instead of putting "xxxx"; it is to show what an Auth token looks like, it is obviously not my real token. Also, the user used here is the one you connect to your tenancy with the console so most likely your email address.

Now to copy the cwallet.sso file into the WALLETS directory, we need to know the path of that file; for now we just know that it is located into the wallets bucket. You can find this path from the console in "Object Details" on the right of the file when you list the content of your bucket. I could not find a way to get that info using the oci client, this is then an opportunity to learn how these paths are built and build it ourselves.

Object paths are of this form (I put shell variables in the path as this is how we're gonna build it):
https://${NAMESPACE}.objectstorage.${REGION}.oci.customer-oci.com/n/${NAMESPACE}/b/${BUCKET_NAME}/o/${FILE}
We can find these values as below:
[fred@myvm ~] NAMESPACE=$(oci os ns get | jq -r '.data')
[fred@myvm ~] REGION="us-ashburn-1"     <== this can be found in the ~/.oci/config file
[fred@myvm ~] BUCKET_NAME="wallets"
[fred@myvm ~] FILE="cwallet.sso"
[fred@myvm ~] echo "https://${NAMESPACE}.objectstorage.${REGION}.oci.customer-oci.com/n/${NAMESPACE}/b/${BUCKET_NAME}/o/${FILE}"
https://ihdfd7683hjkz.objectstorage.us-ashburn-1.oci.customer-oci.com/n/ihdfd7683hjkz/b/wallets/o/cwallet.sso
[fred@myvm ~]
And we get file path of the file! We can finally copy the cwallet.sso file from our bucket into the directory (DBFS)!
SQL> show user
USER is "ADMIN"
SQL> BEGIN
  2  DBMS_CLOUD.GET_OBJECT(
  3  object_uri => 'https://ihdfd7683hjkz.objectstorage.us-ashburn-1.oci.customer-oci.com/n/ihdfd7683hjkz/b/wallets/o/cwallet.sso',
  4  directory_name => 'WALLETS',
  5  credential_name => 'fred_cred_for_wallet_dblink');
  6  END;
  7  /
PL/SQL procedure successfully completed.
SQL> SELECT OBJECT_NAME, BYTES, CREATED, LAST_MODIFIED from DBMS_CLOUD.LIST_FILES('WALLETS');
OBJECT_NAME             BYTES CREATED                                            LAST_MODIFIED
------------------ ---------- ------------------------------------------------ ---------------------------------------------
cwallet.sso              5349 30-SEP-24 02.21.22.000000 PM +00:00                30-SEP-24 02.21.22.000000 PM +00:00
SQL>


2.5/ Drop your bucket if you created one just for this transfer

If you have created a dedicated bucket for this transfer, you may want to drop it to keep things clean, we won't need it anymore.
[fred@myvm ~] oci os bucket delete --name wallets
Are you sure you want to delete this bucket? [y/N]: y
[fred@myvm ~]


3/ Create the DB Link

OK! we can now create the DB Link -- after we create some more credentials: the credentials to connect to the PROD1 database:
SQL> BEGIN
2  DBMS_CLOUD.CREATE_CREDENTIAL(credential_name => 'PROD1_USER', username => 'A_PROD1_USER', password => 'xxxxxxxxxx');
3  END;
4  /
PL/SQL procedure successfully completed.
SQL>
And (finally !) create the DB Link. You'll need the below information from the tnsnames.ora file from the wallet we generated during step 1:
  • hostname => xxxxxxx.adb.us-ashburn-1.oraclecloud.com
  • port => 1522
  • service_name => yyyyyyy.adb.oraclecloud.com
SQL> BEGIN
  2  DBMS_CLOUD_ADMIN.CREATE_DATABASE_LINK(
  3  db_link_name => 'TO_PROD1',
  4  hostname => 'xxxxxxx.adb.us-ashburn-1.oraclecloud.com',
  5  port => '1522',
  6  service_name => 'yyyyyyy.adb.oraclecloud.com',
  7  credential_name => 'PROD1_USER',
  8  directory_name => 'WALLETS',
  9  private_target => TRUE,
 10  public_link => TRUE);
 11  END;
 12  /
PL/SQL procedure successfully completed.
SQL>


And now the moment of truth: testing the DB Link !
SQL> select count(*) from user_objects@SOURCE_DATABASE;
  COUNT(*)
----------
      1994
SQL>


Congratulations, now go enjoy your new DB Link between your 2 autonomous databases!

OCI: Setting up API Keys

GUI interfaces are nice and beautiful but they are usually less efficient than the command line. Let's explore how to set up API Keys in OCI (Oracle Cloud Infrastructure) to be able to use the command line instead of the OCI Console.

First of all, we need to have the oci-cli installed which is installed by default on OCI VMs:
[fred@myvm ~]$ type oci
oci is /usr/local/bin/oci
[fred@myvm ~]$ oci --version
3.47.0
[fred@myvm ~]$
If it is not installed on your system, the install doc can be found here for all the supported systems, it takes a minute.
So let's start by, let's say, try to create a bucket using the command line (you'l find the compartment id of the compartment you want to create your bucket in the compartment page, just seach for "compartment" in the OCI console):
[fred@myvm ~]$ oci os bucket create --name this_is_my_bucket --compartment-id gdsgshdsgbjgfjhfgdhfgdsjhgdjhgdfjds
ERROR: Could not find config file at /home/fred/.oci/config
Do you want to create a new config file? [Y/n]: n
[fred@myvm ~]$
So we are asked for a ~/.oci/config file which does not exist by default; we are also offered to create a new one; I would recommend saying no to this question, the following procedure seems awkward to me. Let's create that ~/.oci/config file manually instead.

First, on the top right of the OCi console, click on your profile and "My Profile":
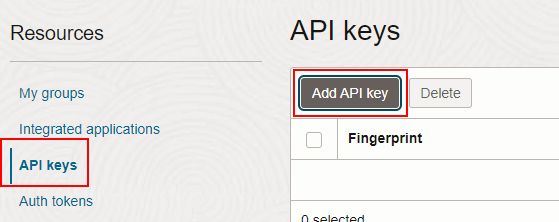
Then, on the bottom left, on "API Keys" and "Add API Key":
Here, you have to download your private key (and do not lose it) -- as mentioned, this is the only time you could do it so keep it safe:
Now is shown to you the content you need to copy into that ~/.oci/config configuration file on your VM:
Let's create this ~/.oci directory and this ~/.oci/config file:
[fred@myvm ~]$ mkdir ~/.oci
[fred@myvm ~]$ vi ~/.oci/config
[fred@myvm ~]$ cat ~/.oci/config
[DEFAULT]
user=ocid1.user.oc1..aaaaaabbbbbccccccccccdddddddddddeeeeeeee
fingerprint=66:xxxxxxxxxxxxxxxxx
tenancy=ocid1.tenancy.oc1.. aaaaaabbbbbccccccccccdddddddddddeeeeeeee
region=us-ashburn-1
key_file=~/.oci/fred_myvm.key
[fred@myvm ~]$
So here I have just pasted in ~/.oci/config the content I copied from the OCI console. There is only one thing to update is to point the key_file parameter to a file which contain the private key you have downloaded in the previous step; you can name this file with whatever name and extension but keep it in the ~/.oci directory. You can just open the private key you have previously downloaded and paste it in the file:
[fred@myvm ~]$ vi ~/.oci/fred_myvm.key
[fred@myvm ~]$
Same as SSH, these files are very strict on permission, thanksfully, Oracle provides a tool which sets everything correctly for us:
[fred@myvm ~]$ oci setup repair-file-permissions --file /home/fred/.oci/config
[fred@myvm ~]$ ls -altr ~/.oci
total 8
-rw-------. 1 fred fred  290 Sep 26 12:28 config
-rw-------. 1 fred fred 1716 Sep 26 12:29 fred_myvm.key
drwx------. 4 fred fred  123 Sep 26 12:29 ..
drwxrwxr-x. 2 fred fred   41 Sep 26 12:29 .
[fred@myvm ~]$
Let's nor retry to create a bucket!
[fred@myvm ~]$ oci os bucket create --name this_is_my_bucket --compartment-id ocid1.compartment.oc1..gdsgshdsgbjgfjhfgdhfgdsjhgdjhgdfjds
{
  "data": {
    "approximate-count": null,
    . . .
    "metadata": {},
    "name": "this_is_my_bucket",
    "namespace": "xxxxx",
    . . .
    "time-created": "2024-09-26T12:35:47.425000+00:00",
  . . .
}
[fred@myvm ~]$
Very cool, we have created a bucket using the command line. Note that I didn't need to specify any profile in my command line as the API keys I added in my ~/.oci/config are in the DEFAULT profile (by the way, profile names are key sensitive and the default one is DEFAULT and not default):
[fred@myvm ~]$ cat ~/.oci/config
[DEFAULT]
user=ocid1.user.oc1..aaaaaabbbbbccccccccccdddddddddddeeeeeeee
fingerprint=66:xxxxxxxxxxxxxxxxx
tenancy=ocid1.tenancy.oc1.. aaaaaabbbbbccccccccccdddddddddddeeeeeeee
region=us-ashburn-1
[fred@myvm ~]$
Note that you can change this which would allow you to use many different configurations to being able to connect to different tenancies from the same OS user or connect to different users (with different privileges) to the same tenancy:
[fred@myvm ~]$ cat ~/.oci/config
[PROD1]
user=ocid1.user.oc1..aaaaaabbbbbccccccccccdddddddddddeeeeeeee
fingerprint=66:xxxxxxxxxxxxxxxxx
tenancy=ocid1.tenancy.oc1..aaaaaabbbbbccccccccccdddddddddddeeeeeeee
region=us-ashburn-1
[PROD2]
user=ocid1.user.oc1..xxxxxxxxxyyyyyyyzzzzzzzzzzz
fingerprint=66:zzzzzzzzzzz
tenancy=ocid1.tenancy.oc1..xxxxxxxxxyyyyyyyzzzzzzzzzzz
region=us-ashburn-1
[fred@myvm ~]$
Above shows a configuration pointing to 2 different tenancies: PROD1 and PROD2. Let's say I created the bucket above in PROD1, I now have to specificy the profile to use as there is no default anymore:
[fred@myvm ~]$ oci os object list --all --bucket-name this_is_my_bucket
ERROR: The config file at ~/.oci/config is invalid:
+Config Errors+---------+----------------------------------------------------------------------------------+
| Key         | Error   | Hint                                                                             |
+-------------+---------+----------------------------------------------------------------------------------+
| user        | missing | log into the console and go to the user's settings page to find their OCID       |
| fingerprint | missing | openssl rsa -pubout -outform DER -in  | openssl md5 -c |
| key_file    | missing | the full path and filename of the private PEM key file                           |
| region      | missing | for example, us-phoenix-1                                                        |
| tenancy     | missing | log into the console and find this OCID at the bottom of any page                |
+-------------+---------+----------------------------------------------------------------------------------+
[fred@myvm ~]$ oci os object list --all --bucket-name this_is_my_bucket --profile PROD1
{
  "prefixes": []   <== there is nothing in my bucket which is expected
}
[fred@myvm ~]$
Unfortunately, you cannot add more to that ~/.oci/config file; it would indeed by handy for example to be able to add the compartment-id not to have to specift it in all the command lines which require it but it may come later, who knows.

Last but not least, mind that any oci command line has a --help option which will show you any possible option; this is pretty well documented:
[fred@myvm ~]$ oci --help
. . .
[fred@myvm ~]$ oci os bucket create --help
. . .
[fred@myvm ~]$
Let's drop that example bucket to keep things clean:
[fred@myvm ~]$ oci os bucket delete --name this_is_my_bucket --profile PROD1
Are you sure you want to delete this bucket? [y/N]: y
[fred@myvm ~]$
And you are now ready ot use the OCI command line!

Oracle Cloud (OCI) Automatic Backups Troubleshooting

I could start this blog the same way as this one as everything is supposed to be easy and at a 1 click distance in any Cloud so should it be for the databases backups in Oracle Cloud !


If is it indeed truely easy to set up automatic databases backups (if you haven't manually recreated the database -- do not do that, I did it for you already :)) in a few clicks:

. . . the troubleshooting is another story . . .

Indeed, you may find this kind of output in your console one day or another:

And here, you are "at 1 click distance" to . . . the documentation and you have no way to open the backup logfiles in your browser like I would have expected and the documentation shows you how to manually troubleshoot the backups (like on any non-Cloud database **but** with the Cloud software system -- let's look at how this work then !). I can now confirm that vi, grep and friends have not been killed by The Cloud :)

First of all, you need to check the database(s) which is(are) running there. You are indeed supposed to already know it but double checking with dbcli ensure that your system is healthy from a Cloud configuration perspective and that you could go further:
[root@oci_server ~]# dbcli list-databases

ID                                       DB Name    DB Type  DB Version           CDB        Class    Shape    Storage    Status        DbHomeID                                
---------------------------------------- ---------- -------- -------------------- ---------- -------- -------- ---------- ------------ ----------------------------------------
d5b748a3-c9ca-4ad0-87b4-a6228b4a3e57     MYDB122    Si       12.2.0.1.190115      true       Oltp              ASM        Configured   72371d3f-74ee-4925-b0c1-232b5a4c9145    
[root@oci_server ~]#
OK now, we can have the list of jobs which happened on this database (I tailed it as this command will list all the jobs, feel free to "grep Failure" if you wish):
[root@oci_server ~]# dbcli list-jobs | grep -i MYDB122 | tail -20
4c3860ac-8cf1-4987-9ef1-fc2e2442ce7a     Create Regular-L0 Backup with TAG-DBTRegular-L01569481521878j3k for Db:MYDB122 in OSS:bYmzpVkMq1BLgxHxZSwc September 26, 2019 7:06:38 AM UTC   Failure   
6f604571-d73c-4c0f-b172-836628fc386d     Create Regular-L0 Backup with TAG-DBTRegular-L01569567793191oB6 for Db:MYDB122 in OSS:bYmzpVkMq1BLgxHxZSwc September 27, 2019 7:05:12 AM UTC   Failure   
be730740-b599-4c9b-8bfe-50d1c3ec50ab     Create Regular-L0 Backup with TAG-DBTRegular-L01569654323853e8o for Db:MYDB122 in OSS:bYmzpVkMq1BLgxHxZSwc September 28, 2019 7:06:54 AM UTC   Failure   
ca020c2f-12d3-435d-aa78-22b3e8718d1d     Create Regular-L0 Backup with TAG-DBTRegular-L0156974066756851B for Db:MYDB122 in OSS:bYmzpVkMq1BLgxHxZSwc September 29, 2019 7:20:54 AM UTC   Failure   
2d00f5a5-5ede-4fd6-b196-b460750e367b     Create Regular-L0 Backup with TAG-DBTRegular-L01569827110982sy7 for Db:MYDB122 in OSS:bYmzpVkMq1BLgxHxZSwc September 30, 2019 7:07:07 AM UTC   Failure   
c8d910ef-1cd3-4310-9636-5bb6ba15cbb1     Create Regular-L0 Backup with TAG-DBTRegular-L01569913536096G7c for Db:MYDB122 in OSS:bYmzpVkMq1BLgxHxZSwc October 1, 2019 7:07:18 AM UTC      Failure   
5b9c15b8-8938-43ba-8e16-db25e8b94407     Create Regular-L0 Backup with TAG-DBTRegular-L01569999888129pmL for Db:MYDB122 in OSS:bYmzpVkMq1BLgxHxZSwc October 2, 2019 7:05:54 AM UTC      Failure   
010909de-bae0-4511-bda9-81d2955cfd75     Create Regular-L0 Backup with TAG-DBTRegular-L01570086276758tz0 for Db:MYDB122 in OSS:bYmzpVkMq1BLgxHxZSwc October 3, 2019 7:21:21 AM UTC      Failure   
5aae3578-7451-4c7c-9071-c643e7f01417     Create Regular-L0 Backup with TAG-DBTRegular-L01570172676836JSm for Db:MYDB122 in OSS:bYmzpVkMq1BLgxHxZSwc October 4, 2019 7:05:40 AM UTC      Success   
ea9c92b4-299e-4a15-93aa-c3f40f290a9b     Delete Backup for Database name: MYDB122_phx1bf                             October 4, 2019 7:18:26 AM UTC      Success   
76d0531a-3599-41ba-b440-4261db78c292     Create Regular-L1 Backup with TAG-DBTRegular-L11570259048404mCf for Db:MYDB122 in OSS:bYmzpVkMq1BLgxHxZSwc October 5, 2019 7:05:49 AM UTC      Success   
4055c4bc-9594-491f-b18c-82c15081cf5c     Delete Backup for Database name: MYDB122_phx1bf                             October 5, 2019 7:54:06 AM UTC      Success   
18424327-f775-40e5-bbdb-f73e03453c0a     Create Regular-L0 Backup with TAG-DBTRegular-L01570345462290fs3 for Db:MYDB122 in OSS:bYmzpVkMq1BLgxHxZSwc October 6, 2019 7:05:28 AM UTC      Success   
5a05e4c7-d857-46f0-9030-5f33f6722860     Delete Backup for Database name: MYDB122_phx1bf                             October 6, 2019 7:49:22 AM UTC      Success   
a7a51004-2da4-452f-a02e-1b6f11afc87a     Create Regular-L1 Backup with TAG-DBTRegular-L11570431880603Lmh for Db:MYDB122 in OSS:bYmzpVkMq1BLgxHxZSwc October 7, 2019 7:15:23 AM UTC      Success   
f0404baf-84cd-4c58-a4cd-5ccbf3bd3ccd     Delete Backup for Database name: MYDB122_phx1bf                             October 7, 2019 8:18:46 AM UTC      Success   
249b81d9-1efd-4494-bf6f-0bfae8acaf76     Create Regular-L1 Backup with TAG-DBTRegular-L11570518241132W91 for Db:MYDB122 in OSS:bYmzpVkMq1BLgxHxZSwc October 8, 2019 7:05:23 AM UTC      Success   
2b019e8a-a466-4084-87d3-03984c037754     Delete Backup for Database name: MYDB122_phx1bf                             October 8, 2019 8:19:44 AM UTC      Success   
93303906-4af4-499e-98b9-067010e05134     Create Regular-L1 Backup with TAG-DBTRegular-L11570604660275VZv for Db:MYDB122 in OSS:bYmzpVkMq1BLgxHxZSwc October 9, 2019 7:05:56 AM UTC      Success   
2f04d01b-1912-43cb-91b0-2dd231013030     Delete Backup for Database name: MYDB122_phx1bf                             October 9, 2019 8:00:09 AM UTC      Success   
[root@oci_server ~]# 
We can see here that some backups are Sucessful and some are not as we could see on the console. Let's check the latest one which failed:
[root@oci_server ~]# dbcli describe-job -i 010909de-bae0-4511-bda9-81d2955cfd75 -j
{
  "jobId" : "010909de-bae0-4511-bda9-81d2955cfd75",
  "status" : "Failure",
  "message" : "DCS-10001:Internal error encountered: Failed to run RMAN command. Please refer log at location : oci_server: /opt/oracle/dcs/log/oci_server/rman/bkup/MYDB122_phx1bf/rman_backup_DBTRegular-L01570086276758tz0_2019-10-03_07-22-07-6121233765598704321.log.",
  "reports" : [ {
    "taskId" : "TaskZLockWrapper_7698",
    "taskName" : "task:TaskZLockWrapper_7698",
    "taskResult" : "DCS-10001:Internal error encountered: Failed to run RMAN command. Please refer log at location : oci_server: /opt/oracle/dcs/log/oci_server/rman/bkup/MYDB122_phx1bf/rman_backup_DBTRegular-L01570086276758tz0_2019-10-03_07-22-07-6121233765598704321.log.",
    "startTime" : "October 03, 2019 07:21:24 AM UTC",
    "endTime" : "October 03, 2019 07:22:21 AM UTC",
    "status" : "Failure",
    "taskDescription" : null,
    "parentTaskId" : "TaskServiceRequest_7697",
    "jobId" : "010909de-bae0-4511-bda9-81d2955cfd75",
    "tags" : [ ],
    "reportLevel" : "Error",
    "updatedTime" : "October 03, 2019 07:22:21 AM UTC"
  }, {
    "taskId" : "TaskSequential_7699",
    "taskName" : "task:TaskSequential_7699",
    "taskResult" : "DCS-10001:Internal error encountered: Failed to run RMAN command. Please refer log at location : oci_server: /opt/oracle/dcs/log/oci_server/rman/bkup/MYDB122_phx1bf/rman_backup_DBTRegular-L01570086276758tz0_2019-10-03_07-22-07-6121233765598704321.log.",
    "startTime" : "October 03, 2019 07:21:24 AM UTC",
    "endTime" : "October 03, 2019 07:22:21 AM UTC",
    "status" : "Failure",
    "taskDescription" : null,
    "parentTaskId" : "TaskZLockWrapper_7698",
    "jobId" : "010909de-bae0-4511-bda9-81d2955cfd75",
    "tags" : [ ],
    "reportLevel" : "Error",
    "updatedTime" : "October 03, 2019 07:22:21 AM UTC"
  }, {
    "taskId" : "TaskParallel_7700",
    "taskName" : "Validate backup config",
    "taskResult" : "",
    "startTime" : "October 03, 2019 07:21:24 AM UTC",
    "endTime" : "October 03, 2019 07:21:24 AM UTC",
    "status" : "Success",
    "taskDescription" : null,
    "parentTaskId" : "TaskSequential_7699",
    "jobId" : "010909de-bae0-4511-bda9-81d2955cfd75",
    "tags" : [ ],
    "reportLevel" : "Info",
    "updatedTime" : "October 03, 2019 07:21:24 AM UTC"
  }, {
    "taskId" : "TaskZJsonRpcExt_7703",
    "taskName" : "Validate opc_pfile configuration",
    "taskResult" : "successfully validated the opc_config",
    "startTime" : "October 03, 2019 07:21:24 AM UTC",
    "endTime" : "October 03, 2019 07:21:24 AM UTC",
    "status" : "Success",
    "taskDescription" : null,
    "parentTaskId" : "TaskSequential_7699",
    "jobId" : "010909de-bae0-4511-bda9-81d2955cfd75",
    "tags" : [ ],
    "reportLevel" : "Info",
    "updatedTime" : "October 03, 2019 07:21:24 AM UTC"
  }, {
    "taskId" : "TaskParallel_7705",
    "taskName" : "Database container validation",
    "taskResult" : "",
    "startTime" : "October 03, 2019 07:21:24 AM UTC",
    "endTime" : "October 03, 2019 07:21:25 AM UTC",
    "status" : "Success",
    "taskDescription" : null,
    "parentTaskId" : "TaskSequential_7699",
    "jobId" : "010909de-bae0-4511-bda9-81d2955cfd75",
    "tags" : [ ],
    "reportLevel" : "Info",
    "updatedTime" : "October 03, 2019 07:21:25 AM UTC"
  }, {
    "taskId" : "TaskParallel_7708",
    "taskName" : "libopc existence check",
    "taskResult" : "",
    "startTime" : "October 03, 2019 07:21:25 AM UTC",
    "endTime" : "October 03, 2019 07:21:25 AM UTC",
    "status" : "Success",
    "taskDescription" : null,
    "parentTaskId" : "TaskSequential_7699",
    "jobId" : "010909de-bae0-4511-bda9-81d2955cfd75",
    "tags" : [ ],
    "reportLevel" : "Info",
    "updatedTime" : "October 03, 2019 07:21:25 AM UTC"
  }, {
    "taskId" : "TaskZJsonRpcExt_7711",
    "taskName" : "Backup Validations",
    "taskResult" : "Successfully validated for database backup",
    "startTime" : "October 03, 2019 07:21:25 AM UTC",
    "endTime" : "October 03, 2019 07:21:46 AM UTC",
    "status" : "Success",
    "taskDescription" : null,
    "parentTaskId" : "TaskSequential_7699",
    "jobId" : "010909de-bae0-4511-bda9-81d2955cfd75",
    "tags" : [ ],
    "reportLevel" : "Info",
    "updatedTime" : "October 03, 2019 07:21:46 AM UTC"
  }, {
    "taskId" : "TaskZJsonRpcExt_7713",
    "taskName" : "Recovery Window validation",
    "taskResult" : "successfully validated recovery window",
    "startTime" : "October 03, 2019 07:21:46 AM UTC",
    "endTime" : "October 03, 2019 07:21:53 AM UTC",
    "status" : "Success",
    "taskDescription" : null,
    "parentTaskId" : "TaskSequential_7699",
    "jobId" : "010909de-bae0-4511-bda9-81d2955cfd75",
    "tags" : [ ],
    "reportLevel" : "Info",
    "updatedTime" : "October 03, 2019 07:21:53 AM UTC"
  }, {
    "taskId" : "TaskZJsonRpcExt_7716",
    "taskName" : "Archivelog deletion policy configuration",
    "taskResult" : "Skipping the Archivelog deletion policy configuration",
    "startTime" : "October 03, 2019 07:21:53 AM UTC",
    "endTime" : "October 03, 2019 07:22:01 AM UTC",
    "status" : "Success",
    "taskDescription" : null,
    "parentTaskId" : "TaskParallel_7715",
    "jobId" : "010909de-bae0-4511-bda9-81d2955cfd75",
    "tags" : [ ],
    "reportLevel" : "Info",
    "updatedTime" : "October 03, 2019 07:22:01 AM UTC"
  }, {
    "taskId" : "TaskZJsonRpcExt_7718",
    "taskName" : "Database backup",
    "taskResult" : "DCS-10001:Internal error encountered: Failed to run RMAN command. Please refer log at location : oci_server: /opt/oracle/dcs/log/oci_server/rman/bkup/MYDB122_phx1bf/rman_backup_DBTRegular-L01570086276758tz0_2019-10-03_07-22-07-6121233765598704321.log.",
    "startTime" : "October 03, 2019 07:22:01 AM UTC",
    "endTime" : "October 03, 2019 07:22:21 AM UTC",
    "status" : "Failure",
    "taskDescription" : null,
    "parentTaskId" : "TaskSequential_7699",
    "jobId" : "010909de-bae0-4511-bda9-81d2955cfd75",
    "tags" : [ ],
    "reportLevel" : "Error",
    "updatedTime" : "October 03, 2019 07:22:21 AM UTC"
  } ],
  "createTimestamp" : "October 03, 2019 07:21:21 AM UTC",
  "resourceList" : [ ],
  "description" : "Create Regular-L0 Backup with TAG-DBTRegular-L01570086276758tz0 for Db:MYDB122 in OSS:bYmzpVkMq1BLgxHxZSwc",
  "updatedTime" : "October 03, 2019 07:22:21 AM UTC"
}
[root@oci_server ~]# 
I am not sure why Oracle documentation points to use the "-j" option which is to have a JSON output; indeed, a regular TEXT output looks more clear to me. May be because the JSON outputs usually have more information than the TEXT outputs but for this particular case, the TEXT output has the logfile I am looking for which is enough for now:
[root@oci_server ~]# dbcli describe-job -i 010909de-bae0-4511-bda9-81d2955cfd75M   

Job details                                                      
----------------------------------------------------------------
                     ID:  010909de-bae0-4511-bda9-81d2955cfd75
            Description:  Create Regular-L0 Backup with TAG-DBTRegular-L01570086276758tz0 for Db:MYDB122 in OSS:bYmzpVkMq1BLgxHxZSwc
                 Status:  Failure
                Created:  October 3, 2019 7:21:21 AM UTC
                Message:  DCS-10001:Internal error encountered: Failed to run RMAN command. Please refer log at location : oci_server: /opt/oracle/dcs/log/oci_server/rman/bkup/MYDB122_phx1bf/rman_backup_DBTRegular-L01570086276758tz0_2019-10-03_07-22-07-6121233765598704321.log.

Task Name                                Start Time                          End Time                            Status    
---------------------------------------- ----------------------------------- ----------------------------------- ----------
task:TaskZLockWrapper_7698               October 3, 2019 7:21:24 AM UTC      October 3, 2019 7:22:21 AM UTC      Failure   
task:TaskSequential_7699                 October 3, 2019 7:21:24 AM UTC      October 3, 2019 7:22:21 AM UTC      Failure   
Validate backup config                   October 3, 2019 7:21:24 AM UTC      October 3, 2019 7:21:24 AM UTC      Success   
Validate opc_pfile configuration         October 3, 2019 7:21:24 AM UTC      October 3, 2019 7:21:24 AM UTC      Success   
Database container validation            October 3, 2019 7:21:24 AM UTC      October 3, 2019 7:21:25 AM UTC      Success   
libopc existence check                   October 3, 2019 7:21:25 AM UTC      October 3, 2019 7:21:25 AM UTC      Success   
Backup Validations                       October 3, 2019 7:21:25 AM UTC      October 3, 2019 7:21:46 AM UTC      Success   
Recovery Window validation               October 3, 2019 7:21:46 AM UTC      October 3, 2019 7:21:53 AM UTC      Success   
Archivelog deletion policy configuration October 3, 2019 7:21:53 AM UTC      October 3, 2019 7:22:01 AM UTC      Success   
Database backup                          October 3, 2019 7:22:01 AM UTC      October 3, 2019 7:22:21 AM UTC      Failure   

[root@oci_server ~]# 
The above output makes it clear that we'll find the problem in the /opt/oracle/dcs/log/oci_server/rman/bkup/MYDB122_phx1bf/rman_backup_DBTRegular-L01570086276758tz0_2019-10-03_07-22-07-6121233765598704321.log file.

In this logfile, you'll find all the RMAN logs of the backup including the RMAN code which is used by the automatic backups:
RMAN> set echo on;
2> set command id to "010909de-bae0-4511-bda9-81d2955c";
3> report schema;
4> show all;
5> list incarnation of database;
6> set echo on;
7> set encryption on;
8> backup force device type sbt as compressed backupset incremental level 0 database tag 'DBTRegular-L01570086276758tz0' format 'DBTRegular-L01570086276758tz0_df_%d_%I_%U_%T_%t_set%s' plus archivelog not backed up tag 'DBTRegular-L01570086276758tz0' format 'DBTRegular-L01570086276758tz0_arc_%d_%I_%U_%T_%t_set%s' ;
9> backup device type sbt as compressed backupset current controlfile tag 'DBTRegular-L01570086276758tz0' format 'DBTRegular-L01570086276758tz0_cf_%d_%I_%U_%T_%t_set%s' spfile tag 'DBTRegular-L01570086276758tz0' format 'DBTRegular-L01570086276758tz0_spf_%d_%I_%U_%T_%t_set%s' ;
10> delete force noprompt obsolete;
11> set encryption off;
12>
And the error which was in this case due to a FRA full:
Starting backup at 2019/10/03 07:22:16
ORACLE error from target database:
ORA-16038: log 3 sequence# 2319 cannot be archived
ORA-19809: limit exceeded for recovery files
ORA-00312: online log 3 thread 1: '+RECO/MYDB122_PHX1BF/ONLINELOG/group_3.259.1008210757'
You can now fix your FRA full issue and the next backup should be successful !

Let's explore a bit more here and have a look at a successful backup:
[root@oci_server ~]# dbcli describe-job -i 93303906-4af4-499e-98b9-067010e05134 

Job details                                                      
----------------------------------------------------------------
                     ID:  93303906-4af4-499e-98b9-067010e05134
            Description:  Create Regular-L1 Backup with TAG-DBTRegular-L11570604660275VZv for Db:MYDB122 in OSS:bYmzpVkMq1BLgxHxZSwc
                 Status:  Success
                Created:  October 9, 2019 7:05:56 AM UTC
                Message:  

Task Name                                Start Time                          End Time                            Status    
---------------------------------------- ----------------------------------- ----------------------------------- ----------
Validate backup config                   October 9, 2019 7:06:00 AM UTC      October 9, 2019 7:06:00 AM UTC      Success   
Validate opc_pfile configuration         October 9, 2019 7:06:00 AM UTC      October 9, 2019 7:06:00 AM UTC      Success   
Database container validation            October 9, 2019 7:06:00 AM UTC      October 9, 2019 7:06:00 AM UTC      Success   
libopc existence check                   October 9, 2019 7:06:00 AM UTC      October 9, 2019 7:06:00 AM UTC      Success   
Backup Validations                       October 9, 2019 7:06:00 AM UTC      October 9, 2019 7:06:22 AM UTC      Success   
Recovery Window validation               October 9, 2019 7:06:22 AM UTC      October 9, 2019 7:06:28 AM UTC      Success   
Archivelog deletion policy configuration October 9, 2019 7:06:28 AM UTC      October 9, 2019 7:06:36 AM UTC      Success   
crosscheck database backup               October 9, 2019 7:06:36 AM UTC      October 9, 2019 7:06:57 AM UTC      Success   
Database backup                          October 9, 2019 7:06:57 AM UTC      October 9, 2019 7:59:14 AM UTC      Success   
Restore preview validate database        October 9, 2019 7:59:14 AM UTC      October 9, 2019 7:59:29 AM UTC      Success   
Backup TDE Wallet files to ObjectStore   October 9, 2019 7:59:29 AM UTC      October 9, 2019 7:59:29 AM UTC      Success   

[root@oci_server ~]# 
Unfortunately there's no logfile information here. The JSON output neither have the logfile name when a backup is successful (I don't paste it here as it is a very long output to show ... nothing interesting at this point).

So where can I find the logfiles of the backups (successful or not) ?
  • There's no logfile for the successful backups (this is not bug, this is a feature as confirmed by Oracle Support):
  • The unsuccessful backup logs can be found here:
  • /opt/oracle/dcs/log/`hostname -s`/rman/bkup/DB_UNIQUE_NAME/rman_backup_UNIQUE_BACKUP_TAG_A_TIMESTAMP.log
    

Note that you can also directly check / grep the /opt/oracle/dcs/log/dcs-agent.log file which contains some JSON outputs of some backups as well as few kind of DEBUG information. I say that it contains some JSON outputs as in the below example, we can see information about the October 3rd failed backup, about the October 9th successful backup but nothing in between but DEBUG information:
    "parentTaskId" : "TaskSequential_7699",
    "jobId" : "010909de-bae0-4511-bda9-81d2955cfd75",
    "tags" : [ ],
    "reportLevel" : "Error"
  } ],
  "createTimestamp" : "Thu Oct 03, 2019 07:21:21.018 (UTC) [1570087281018]",
  "resourceList" : [ ],
  "description" : "Create Regular-L0 Backup with TAG-DBTRegular-L01570086276758tz0 for Db:MYDB122 in OSS:bYmzpVkMq1BLgxHxZSwc"
}
2019-10-09 23:39:19,456 INFO [dw-494] [] c.o.d.c.t.CustomSslContextFactory: entering SSLEngine
2019-10-09 23:39:20,571 INFO [dw-53] [] c.o.d.c.t.CustomSslContextFactory: entering SSLEngine
2019-10-09 23:39:20,602 INFO [dw-513 - GET /jobs?count=100] [] c.o.d.a.r.JobsApi: Received GET request to getJobsList on JobsApi
2019-10-09 23:39:20,602 INFO [dw-513 - GET /jobs?count=100] [] c.o.d.a.r.JobsApi: where clause:
2019-10-09 23:39:48,764 INFO [dw-72] [] c.o.d.c.t.CustomSslContextFactory: entering SSLEngine
2019-10-09 23:39:49,742 INFO [dw-53] [] c.o.d.c.t.CustomSslContextFactory: entering SSLEngine
2019-10-09 23:39:49,814 INFO [dw-41 - GET /jobs/93303906-4af4-499e-98b9-067010e05134] [] c.o.d.a.r.JobsApi: Received GET request to getJobDetail on JobsApi with jobid = 93303906-4af4-499e-98b9-067010e05134
2019-10-09 23:39:49,818 DEBUG [dw-41 - GET /jobs/93303906-4af4-499e-98b9-067010e05134] [] c.o.d.c.t.r.ServiceJobReport: Add TaskReport r.id=93303906-4af4-499e-98b9-067010e05134 jid=93303906-4af4-499e-98b9-067010e05134 status=Success
2019-10-09 23:39:49,818 DEBUG [dw-41 - GET /jobs/93303906-4af4-499e-98b9-067010e05134] [] c.o.d.c.t.r.ServiceJobReport: Add TaskReport r.id=TaskParallel_10120 jid=93303906-4af4-499e-98b9-067010e05134 status=Success
2019-10-09 23:39:49,818 DEBUG [dw-41 - GET /jobs/93303906-4af4-499e-98b9-067010e05134] [] c.o.d.c.t.r.ServiceJobReport: Add TaskReport r.id=TaskZJsonRpcExt_10123 jid=93303906-4af4-499e-98b9-067010e05134 status=Success
2019-10-09 23:39:49,818 DEBUG [dw-41 - GET /jobs/93303906-4af4-499e-98b9-067010e05134] [] c.o.d.c.t.r.ServiceJobReport: Add TaskReport r.id=TaskParallel_10125 jid=93303906-4af4-499e-98b9-067010e05134 status=Success
2019-10-09 23:39:49,818 DEBUG [dw-41 - GET /jobs/93303906-4af4-499e-98b9-067010e05134] [] c.o.d.c.t.r.ServiceJobReport: Add TaskReport r.id=TaskParallel_10128 jid=93303906-4af4-499e-98b9-067010e05134 status=Success
2019-10-09 23:39:49,818 DEBUG [dw-41 - GET /jobs/93303906-4af4-499e-98b9-067010e05134] [] c.o.d.c.t.r.ServiceJobReport: Add TaskReport r.id=TaskZJsonRpcExt_10131 jid=93303906-4af4-499e-98b9-067010e05134 status=Success
2019-10-09 23:39:49,818 DEBUG [dw-41 - GET /jobs/93303906-4af4-499e-98b9-067010e05134] [] c.o.d.c.t.r.ServiceJobReport: Add TaskReport r.id=TaskZJsonRpcExt_10133 jid=93303906-4af4-499e-98b9-067010e05134 status=Success
2019-10-09 23:39:49,818 DEBUG [dw-41 - GET /jobs/93303906-4af4-499e-98b9-067010e05134] [] c.o.d.c.t.r.ServiceJobReport: Add TaskReport r.id=TaskZJsonRpcExt_10136 jid=93303906-4af4-499e-98b9-067010e05134 status=Success
2019-10-09 23:39:49,818 DEBUG [dw-41 - GET /jobs/93303906-4af4-499e-98b9-067010e05134] [] c.o.d.c.t.r.ServiceJobReport: Add TaskReport r.id=TaskZJsonRpcExt_10138 jid=93303906-4af4-499e-98b9-067010e05134 status=Success
2019-10-09 23:39:49,818 DEBUG [dw-41 - GET /jobs/93303906-4af4-499e-98b9-067010e05134] [] c.o.d.c.t.r.ServiceJobReport: Add TaskReport r.id=TaskZJsonRpcExt_10140 jid=93303906-4af4-499e-98b9-067010e05134 status=Success
2019-10-09 23:39:49,818 DEBUG [dw-41 - GET /jobs/93303906-4af4-499e-98b9-067010e05134] [] c.o.d.c.t.r.ServiceJobReport: Add TaskReport r.id=TaskZJsonRpcExt_10142 jid=93303906-4af4-499e-98b9-067010e05134 status=Success
2019-10-09 23:39:49,818 DEBUG [dw-41 - GET /jobs/93303906-4af4-499e-98b9-067010e05134] [] c.o.d.c.t.r.ServiceJobReport: Add TaskReport r.id=TaskZJsonRpcExt_10144 jid=93303906-4af4-499e-98b9-067010e05134 status=Success
2019-10-09 23:39:49,820 DEBUG [dw-41 - GET /jobs/93303906-4af4-499e-98b9-067010e05134] [] c.o.d.c.t.r.ReportApi: Job Report:
{
  "updatedTime" : "Wed Oct 09, 2019 07:59:29.518 (UTC) [1570607969518]",
  "jobId" : "93303906-4af4-499e-98b9-067010e05134",
  "status" : "Success",
  "message" : null,
  "reports" : [ {

Indeed:
[root@oci_server ~]# grep 010909de-bae0-4511-bda9-81d2955cfd75 /opt/oracle/dcs/log/dcs-agent.log | wc -l  # October 3rd failed backup
48
[root@oci_server ~]# grep 76d0531a-3599-41ba-b440-4261db78c292 /opt/oracle/dcs/log/dcs-agent.log | wc -l  # October 5th successful backup
0
[root@oci_server ~]# grep a7a51004-2da4-452f-a02e-1b6f11afc87a /opt/oracle/dcs/log/dcs-agent.log | wc -l  # October 7th successful backup
0
[root@oci_server ~]# grep 93303906-4af4-499e-98b9-067010e05134 /opt/oracle/dcs/log/dcs-agent.log | wc -l  # October 9th successful backup
5505
[root@oci_server ~]# 
Oracle just says "If you require more information, review the /opt/oracle/dcs/log/dcs-agent.log file." so let's take it like this as it seems that we don't have all the information we expect in this file. By the way, it is interesting to note that this "DCS agent" was already here with ODA (Oracle Database Appliance) and is used to "allow you to manage your database through the cloud platform". It then obviously needs to be improved as we are unable to see a logfile through the console ! (which may come later on)

Thanks for reading and enjoy the Oracle Cloud (OCI) Automatic Backups Troubleshooting !

How to use OCI Gen AI from the Linux command line

OCI Generative AI offers an on-demand service which you can access from your tenancy and pay only for what you use. This is very handy and...