Out of Place patching has become the standard for database patching for years now (
I have described it precisely here) but for any reason, people restrain themselves for doing Out of Place patching for Grid Infrastructure and usually do In Place GI patching and Out of Place GI upgrade (you cannot do In Place upgrade :)). I will describe below how to easily perform GI OOP.
To start on the right foot, a quick reminder of the concept and the required steps of an Out of Place patching:
- Your system is running on a source version home let's say /u01/app/19.0.0.0/grid
- You prepare the future alread patched target home let's say /u01/app/19.11.0.0/grid
- The day of the maintenance, you stop what is running on the source home and restart on the target home
- If, for any reason, something goes wrong, you just have to restart everything on the source home
This can be represented with the below image:
For the purpose of this blog, I will use the below homes in the examples:
- The source GI home: /u01/app/19.0.0.0/grid
- The target GI Home: /u01/app/19.11.0.0/grid
1. Prepare your target home
Preparing the target home is to prepare a GI home with the patches you will want to use; here, I will go with GI 19.11 with the latest opatch, the latest GI JDK and patch 31602782. To achieve this, you can clone a source GI Home or, what I prefer and recommend, to create a gold image of your target home. Oracle has/had a note with a list of already prepared gold image per version but this note has kind of disappeared recently so I gave up on that one. Also, building your own gold image is easy and very good to know how all of that works. To build my target GI 19.11 gold image, you first need to get:
- The base GI 19c version which is 19.3: GI_gold_193_V982068-01.zip -- from edelivery.oracle.com
- The GI 19.11 patch: GI_1911_p32545008_190000_Linux-x86-64.zip
- The latest opatch: opatch_p6880880_122010_Linux-x86-64.zip
- The latest GIJDK: GIJDK_April2021_p32490416_190000_Linux-x86-64.zip (this one is no more the latest but it was the latest when I did this gold image)
- The patch 31602782: p31602782_1911000DBRU_Linux-x86-64.zip
Note: you may want to
have a look at this blog to get the notes where to download GI, the critical patches, GI JDK, etc...
Note 2: you do not have to apply the latest GI JDK, it is to show that you can apply any one-off patch on top of the RUR in your target gold image -- GI tends to have many critical issues and then patches so better to be know how to deal with it. Here is what it looks like once you have the files on your server:
[root@target gioop]# pwd
/u01/stage/gioop
[root@target gioop]# ls -ltr
GI_1911_p32545008_190000_Linux-x86-64.zip               <= GI 19.11 patch
GIJDK_April2021_p32490416_190000_Linux-x86-64.zip       <= April JDK
opatch_p6880880_122010_Linux-x86-64.zip                 <= Latest opatch
GI_gold_193_V982068-01.zip                              <= GI gold image
p31602782_1911000DBRU_Linux-x86-64.zip                  <= Patch 31602782
[root@target gioop]#
Unzip the 19.3 gold image:
[root@target gioop]# mkdir temp
[root@target gioop]# unzip -q GI_gold_193_V982068-01.zip -d temp/.
[root@target gioop]#
Unzip the GI JDK and the 31602782 patch (any number of one-off patches):
[root@target gioop]# unzip -o -q GIJDK_April2021_p32490416_190000_Linux-x86-64.zip
[root@target gioop]# unzip -o -q p31602782_1911000DBRU_Linux-x86-64.zip
[root@target gioop]#
Very importantly, all needs to be done as the oracle (grid owner) user (not root) so give the correct permissions and you should have the below situation:
[root@target gioop]# chown -R oracle:oinstall /u01/stage/gioop
[root@target gioop]# ls -ltr
oracle oinstall       4096 Apr 20 07:17 32545008                                           <= GI 19.11 patch
oracle oinstall       2477 Apr 22 16:16 PatchSearch.xml
oracle oinstall 2523672126 May  7 11:28 GI_1911_p32545008_190000_Linux-x86-64.zip
oracle oinstall  125203135 May  7 11:28 GIJDK_April2021_p32490416_190000_Linux-x86-64.zip
oracle oinstall  120761121 May  7 11:28 opatch_p6880880_122010_Linux-x86-64.zip
oracle oinstall 2889184573 May  7 12:26 GI_gold_193_V982068-01.zip
oracle oinstall       4096 May  7 12:28 temp                                               <= GI gold image
oracle oinstall       4096 May  7 12:33 32490416                                           <= GI JDK
oracle oinstall       4096 Apr 25 21:04 31602782                                           <= Patch 31602782
[root@target gioop]#
Start by upgrading opatch to the latest version:
[root@target gioop]# su - oracle
[oracle@target:]/home/oracle => cd /u01/stage/gioop/temp
[oracle@target:]/u01/stage/gioop/temp => ./OPatch/opatch version
OPatch Version: 12.2.0.1.17
OPatch succeeded.
[oracle@target:]/u01/stage/gioop/temp => unzip -o -q ../opatch_p6880880_122010_Linux-x86-64.zip
[oracle@target:]/u01/stage/gioop/temp =>./OPatch/opatch version
OPatch Version: 12.2.0.1.24
OPatch succeeded.
[oracle@target:]/u01/stage/gioop/temp =>
We can now patch the gold image with GI 19.11, the GI JDK and the patch 31602782; we can do all of this in a single command line:
[oracle@target:]/u01/stage/gioop/temp => ./gridSetup.sh -silent -printtime -waitForCompletion -noCopy -applyRU /u01/stage/gioop/32545008 -applyOneOffs /u01/stage/gioop/31602782,/u01/stage/gioop/32490416
Preparing the home to patch...
Applying the patch /u01/stage/gioop/32545008...
Successfully applied the patch.
Applying the patch /u01/stage/gioop/31602782...
Successfully applied the patch.
Applying the patch /u01/stage/gioop/32490416...
Successfully applied the patch.
The log can be found at: /u01/app/oraInventory/logs/GridSetupActions2021-05-07_01-12-59PM/installerPatchActions_2021-05-07_01-12-59PM.log
Launching Oracle Grid Infrastructure Setup Wizard...
[FATAL] [INS-40426] Grid installation option has not been specified.       <== you can ignore this error
   ACTION: Specify the valid installation option.
[oracle@target:]/u01/stage/gioop/temp =>
Before continuing, we need to temporarely attach the home to the system:
[oracle@target:]/home/oracle => /u01/app/19.0.0.0/grid/oui/bin/runInstaller -attachHome ORACLE_HOME=/u01/stage/gioop/temp ORACLE_HOME_NAME=gold_gi1911
Starting Oracle Universal Installer...

Checking swap space: must be greater than 500 MB.   Actual 24575 MB    Passed
The inventory pointer is located at /etc/oraInst.loc
You can find the log of this install session at:
 /u01/app/oraInventory/logs/AttachHome2021-05-07_01-53-14PM.log
'AttachHome' was successful.
[oracle@target:]/home/oracle =>
Note that you have to attach the home to be able to use opatch and create a gold image but you cannot apply the RU nor the one-off patches if the home is attached:
[oracle@target:]/u01/stage/gioop/temp => ./gridSetup.sh -silent -printtime -waitForCompletion -noCopy -applyRU /u01/stage/gioop/32545008 -applyOneOffs /u01/stage/gioop/31602782,/u01/stage/gioop/32490416
[INS-32826] The software home (/u01/stage/gioop/temp) is already registered in the central inventory. Refer to patch readme instructions on how to apply.
[oracle@target:]/u01/stage/gioop/temp =>
We now have a prepared target home with our target version located in a temporary directory. We can verify the list of patch of our home:
[oracle@target:]/u01/stage/gioop/temp => ./OPatch/opatch lspatches -oh /u01/stage/gioop/temp
31602782;SAME INSTANCE SLAVE PARSE FAILURE FLOOD CONTROL
32490416;JDK BUNDLE PATCH 19.0.0.0.210420
32585572;DBWLM RELEASE UPDATE 19.0.0.0.0 (32585572)
32584670;TOMCAT RELEASE UPDATE 19.0.0.0.0 (32584670)
32579761;OCW RELEASE UPDATE 19.11.0.0.0 (32579761)
32576499;ACFS RELEASE UPDATE 19.11.0.0.0 (32576499)
32545013;Database Release Update : 19.11.0.0.210420 (32545013)

OPatch succeeded.
[oracle@target:]/u01/stage/gioop/temp =>
We will now create our own gold image which we could easily copy and deploy on all the other systems (dev, qa, dr, prod, etc ...):
[oracle@target:]/u01/stage/gioop/temp =>  ./gridSetup.sh -silent -createGoldImage -destinationLocation /u01/stage/gioop/
Launching Oracle Grid Infrastructure Setup Wizard...
Successfully Setup Software.
Gold Image location: /u01/stage/gioop/grid_home_2021-05-07_01-59-02PM.zip
[oracle@target:]/u01/stage/gioop/temp =>
You can now save the prepared gold image
/u01/stage/gioop/grid_home_2021-05-07_01-59-02PM.zip on a central repository server as this is the image you will be usng on all your systems -- this is your future GI !
To keep your systems clean, let's detach the temporary home:
[oracle@target:]/u01/stage/gioop/temp => /u01/app/19.0.0.0/grid/oui/bin/runInstaller -detachHome ORACLE_HOME=/u01/stage/gioop/temp ORACLE_HOME_NAME=gold_gi1911
Starting Oracle Universal Installer...

Checking swap space: must be greater than 500 MB.   Actual 24575 MB    Passed
The inventory pointer is located at /etc/oraInst.loc
[oracle@target:]/u01/stage/gioop/temp =>
2.Switch the home
Create the target GI directory on all the servers
[root@exadb01 ~]# cat ~/dbs_group
exadb01
exadb02
. . .
exadb08
[root@exadb01 ~]# dcli -g ~/dbs_group -l root "df -h /u01"
Filesystem                    Size  Used Avail Use% Mounted on
exad01: /dev/mapper/VGExaDb-LVDbOra1  250G  125G  125G  50% /u01          <= check that you have enough disk space on each node
. . .
[root@exadb01 ~]# dcli -g ~/dbs_group -l root "mkdir -p /u01/app/19.11.0.0/grid; chown -R oracle:oinstall /u01/app/19.11.0.0/grid"
[root@exadb01 ~]#
Unzip the previously prepared goldimage (only on
one node !)
[oracle@exadb01:]/home/oracle => unzip -q /u01/stage/gioop/GI_gold_1911_2021-05-07_01-59-02PM.zip -d /u01/app/19.11.0.0/grid
[oracle@exadb01:]/home/oracle => dcli -g ~/dbs_group -l oracle "du -sh /u01/app/19.11.0.0/grid"
exadb01: 9.9G      /u01/app/19.11.0.0/grid      <== your gold image unzipped here
exadb02: 4.0K      /u01/app/19.11.0.0/grid      <== empty directory here
. . .
exadb08: 4.0K      /u01/app/19.11.0.0/grid<     <== empty directory here
[oracle@exadb01:]/home/oracle =>
Something important here to aboid issues during the patch process; verify that the ASM passwordfile and the ASM spfile is located under ASM (if not, you'll find
a quick procedure here on how to move them to ASM):
[root@exadb01 ~]# . oraenv <<< +ASM1
ORACLE_SID = [root] ? The Oracle base has been set to /u01/app/oracle
[root@exadb01 ~]# asmcmd spget
+DATA/mycluster/ASMPARAMETERFILE/registry.253.1045914043
[root@exadb01 ~]# asmcmd pwget --asm
+DATA/orapwASM
[root@exadb01 ~]#
Prepare a responsefile such as this one:
[oracle@exadb01:+ASM1]/home/oracle => cat /u01/stage/gioop/1911oop_response.rsp
oracle.install.responseFileVersion=/oracle/install/rspfmt_crsinstall_response_schema_v19.0.0
oracle.install.option=CRS_SWONLY
ORACLE_BASE=/u01/app/oracle
oracle.install.asm.OSDBA=oinstall
oracle.install.asm.OSOPER=oinstall
oracle.install.asm.OSASM=oinstall
oracle.install.crs.config.ClusterConfiguration=STANDALONE
[oracle@exadb01:+ASM1]/home/oracle =>
Gridsetup, this will only copy the software across all the nodes, this will NOT modify anything else
[oracle@exadb01:]/u01/app/19.11.0.0/grid => ./gridSetup.sh -silent -responseFile /u01/stage/gioop/1911oop_response.rsp -waitForCompletion
Launching Oracle Grid Infrastructure Setup Wizard...

[WARNING] [INS-41813] OSDBA for ASM, OSOPER for ASM, and OSASM are the same OS group.
   CAUSE: The group you selected for granting the OSDBA for ASM group for database access, and the OSOPER for ASM group for startup and shutdown of Oracle ASM, is the same group as the OSASM group, whose members have SYSASM privileges on Oracle ASM.
   ACTION: Choose different groups as the OSASM, OSDBA for ASM, and OSOPER for ASM groups.
[WARNING] [INS-41874] Oracle ASM Administrator (OSASM) Group specified is same as the inventory group.
   CAUSE: Operating system group oinstall specified for OSASM Group is same as the inventory group.
   ACTION: It is not recommended to have OSASM group same as inventory group. Select any of the group other than the inventory group to avoid incorrect configuration.
The response file for this session can be found at:
 /u01/app/19.11.0.0/grid/install/response/grid_2021-05-10_10-54-29AM.rsp

You can find the log of this install session at:
 /u01/app/oraInventory/logs/GridSetupActions2021-05-10_10-54-29AM/gridSetupActions2021-05-10_10-54-29AM.log

As a root user, execute the following script(s):
        1. /u01/app/19.11.0.0/grid/root.sh

Execute /u01/app/19.11.0.0/grid/root.sh on the following nodes:
[exadb01]
As instructed, run this root.sh script:
[root@exadb01 ~]# /u01/app/19.11.0.0/grid/root.sh
Check /u01/app/19.11.0.0/grid/install/root_exadb01.domain.com_2021-05-10_11-03-09-927603750.log for the output of root script
[root@exadb01 ~]# cat /u01/app/19.11.0.0/grid/install/root_exadb01.domain.com_2021-05-10_11-03-09-927603750.log
Performing root user operation.

The following environment variables are set as:
    ORACLE_OWNER= oracle
    ORACLE_HOME=  /u01/app/19.11.0.0/grid
   Copying dbhome to /usr/local/bin ...
   Copying oraenv to /usr/local/bin ...
   Copying coraenv to /usr/local/bin ...

Entries will be added to the /etc/oratab file as needed by
Database Configuration Assistant when a database is created
Finished running generic part of root script.
Now product-specific root actions will be performed.

To configure Grid Infrastructure for a Cluster or Grid Infrastructure for a Stand-Alone Server execute the following command as oracle user:
/u01/app/19.11.0.0/grid/gridSetup.sh
This command launches the Grid Infrastructure Setup Wizard. The wizard also supports silent operation, and the parameters can be passed through the response file that is available in the installation media.

[root@exadb01 ~]#
OK, this was the last step to be done
before the real maintenance, the next steps are do be done under a window maintenance only as the GI will be switched to the new home node by node stopping all the resources running on the old GI home and restarting all the resources on the new GI home. I will recommend using the
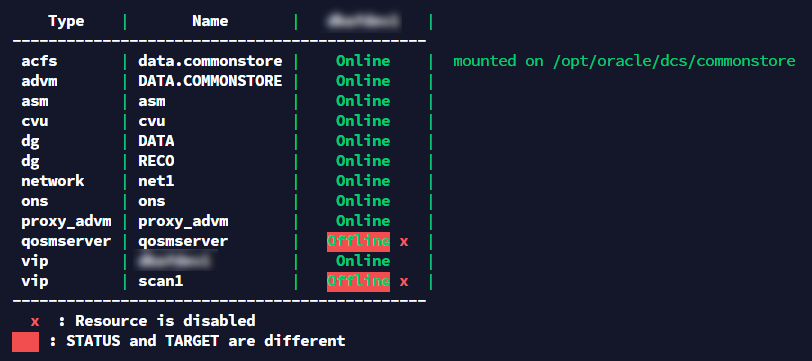
rac-status.sh script to check the status of all the resources of the cluster before switching the home -- and do the same after the home switching to ensure that your maintenance is idempotent:
[oracle@exadb01:]/home/oracle => /u01/app/19.11.0.0/grid/gridSetup.sh -silent -switchGridHome
Launching Oracle Grid Infrastructure Setup Wizard...

You can find the log of this install session at:
 /u01/app/oraInventory/logs/cloneActions2021-05-10_11-05-43AM.log

As a root user, execute the following script(s):
        1. /u01/app/19.11.0.0/grid/root.sh

Execute /u01/app/19.11.0.0/grid/root.sh on the following nodes:
[exadb01, exadb02, exadb03, exadb04, exadb05, exadb06, exadb07, exadb08]

Run the scripts on the local node first. After successful completion, run the scripts in sequence on all other nodes.

Successfully Setup Software.
[oracle@exadb01:]/home/oracle =>
Now, strictly follow the instructions and run the root.sh scripts as instructed; do NOT run them concurrently on multiple nodes; note that they will take time to run:
[root@exadb01 ~]# /u01/app/19.11.0.0/grid/root.sh
Check /u01/app/19.11.0.0/grid/install/root_exadb01.domain.com_2021-05-10_11-11-21-158300990.log for the output of root script
[root@exadb01 ~]#
And so on on all the nodes one by one ... and you are done ! hmm not exactly you need to update your /etc/oratab (on each node) as the ASM entry will be removed by the patching:
[root@exadb01 ~]# grep ASM /etc/oratab
+ASM1:/u01/app/19.11.0.0/grid:N
You can have a look at the inventory and you could see the old and new GI Home as below:
[root@exadb01 ~]# dcli -g ~/dbs_group -l root "grep -i grid /u01/app/oraInventory/ContentsXML/inventory.xml"
exadb01: <HOME NAME="OraGI19Home1" LOC="/u01/app/19.0.0.0/grid" TYPE="O" IDX="1">                     <== old
exadb01: <HOME NAME="OraGI19Home2" LOC="/u01/app/19.11.0.0/grid" TYPE="O" IDX="19" CRS="true"/>       <== new
. . .
exadb08: <HOME NAME="OraGI19Home1" LOC="/u01/app/19.0.0.0/grid" TYPE="O" IDX="1">                     <== old
exadb08: <HOME NAME="OraGI19Home2" LOC="/u01/app/19.11.0.0/grid" TYPE="O" IDX="14" CRS="true"/>       <== new
[root@exadb01 ~]#
Now you are all done ! a last check with
rac-status.sh to ensure that everything is running as expected and you can use the same gold image and procedure to all your GIs !
3. The Rollback procedure
In case of something goes wrong during or after you have switched to your new home, you need to have a tested rollback procedure and the beauty of Out of Place patching is that the old home is still on the system, untouched, as it was before. You then just have to switch back to the old home.
Note that the below
chown -R oracle:oinstall (or to the grid owner) is mandatory; indeed, the switch is ran as root and root.sh will later on put the correct privileges back in place.
[root@exadb01 ~]# dcli -g ~/dbs_group -l root "chown -R oracle:oinstall /u01/app/19.0.0.0/grid"           <== this is mandatory
[root@exadb01 ~]# su - oracle
[oracle@exadb01:]/home/oracle => /u01/app/19.0.0.0/grid/gridSetup.sh -silent -switchGridHome
Launching Oracle Grid Infrastructure Setup Wizard...

You can find the log of this install session at:
 /u01/app/oraInventory/logs/cloneActions2021-05-10_12-25-25PM.log

As a root user, execute the following script(s):
        1. /u01/app/19.0.0.0/grid/root.sh

Execute /u01/app/19.0.0.0/grid/root.sh on the following nodes:
[exadb01, exadb02, exadb03, exadb04, exadb05, exadb06, exadb07, exadb08]

Run the scripts on the local node first. After successful completion, run the scripts in sequence on all other nodes.

Successfully Setup Software.
[oracle@exadb01:]/home/oracle =>
Same as before, now run the root.sh script on each node one by one, do not run them concurrently.
[root@exadb01 ~]# /u01/app/19.0.0.0/grid/root.sh
Check /u01/app/19.0.0.0/grid/install/root_exadb01.domain.com_2021-05-10_12-36-17-716165992.log for the output of root script
[root@exadb01 ~]#
. . .
[root@exadb01 ~]# ssh exadb08
Last login: Mon May 10 11:44:34 2021 from exadb01.domain.com
[root@exadb08 ~]# /u01/app/19.0.0.0/grid/root.sh
Check /u01/app/19.0.0.0/grid/install/root_exadb08.domain.com_2021-05-10_12-49-56-584075655.log for the output of root script
[root@exadb08 ~]#
No, refix back your oratab, execute
rac-status.sh to check that everything is back up and running as expected and you are all done !